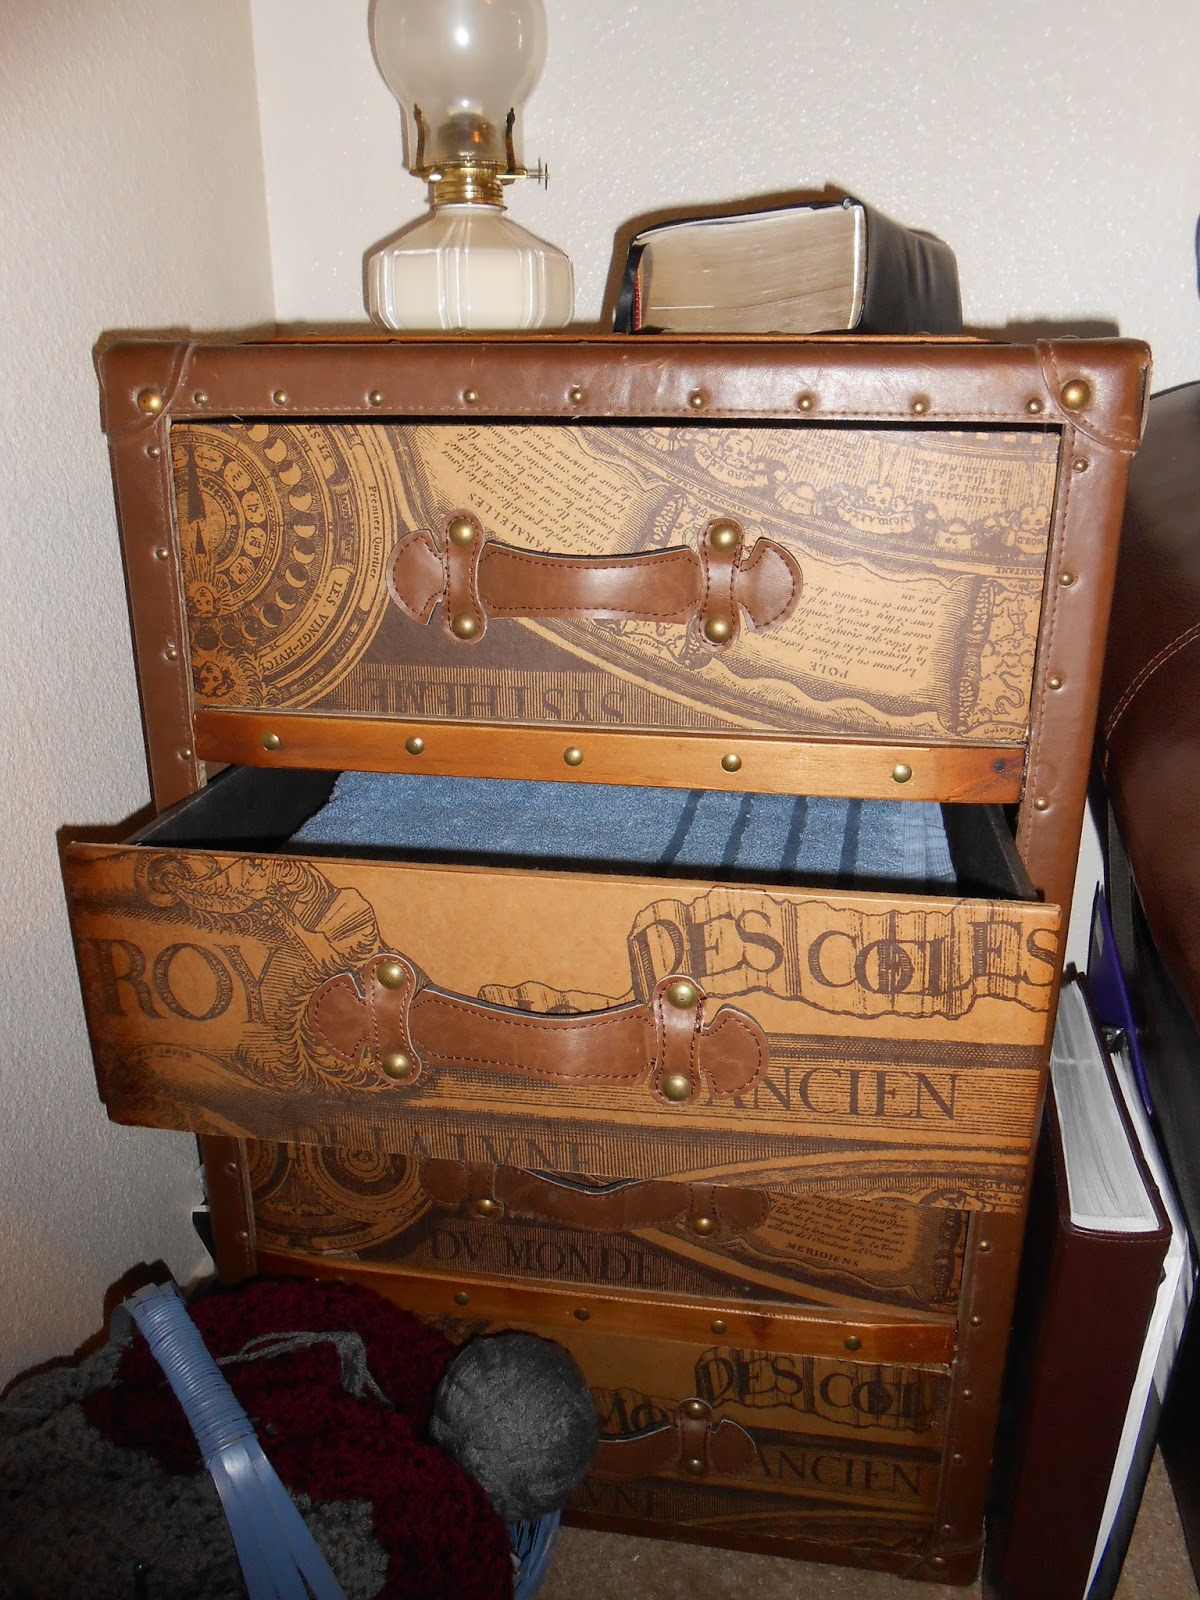
We got home around 9:00, and we were so excited about our new piece of furniture that we put it back together that night. It was pretty simple. The wooden framing that separates the drawers was ripped out, and the interior drawer slides were all broken off, too. All of the drawer faces were separated, and one of them was completely off. It was made very poorly--no glue, no nails, no screws, just staples. (We were amazed they tried to sell it for 300, even intact...it probably cost them around 10 bucks to make!) With a few hours, some wood glue, apoxy, and a pair of pliers, we reconstructed the chest. Here's how it turned out:
Friday, August 9, 2013
Chest of Drawers Reconstruction
We got home around 9:00, and we were so excited about our new piece of furniture that we put it back together that night. It was pretty simple. The wooden framing that separates the drawers was ripped out, and the interior drawer slides were all broken off, too. All of the drawer faces were separated, and one of them was completely off. It was made very poorly--no glue, no nails, no screws, just staples. (We were amazed they tried to sell it for 300, even intact...it probably cost them around 10 bucks to make!) With a few hours, some wood glue, apoxy, and a pair of pliers, we reconstructed the chest. Here's how it turned out:
Pallet Projects
In early spring of this year, Chris and I decided to build some bedside tables. To save money, we bought 10 wooden pallets at $2 apiece, so $20 total. It was a lot of work to take all those nails out, and a lot of the wood was damaged and unusable when we were done (hence the 10 pallets instead of 5). But in the end, we had a HUGE pile of wood...enough to make some insanely awesome paneled rustic nightstands.
...Because we were using so many small pieces, we used a LOT of screws. Still, we probably spent less than $15 on 3 or 4 boxes of screws, and had lots leftover.
The drawer is SUPER NICE. We splurged here and got the nicest drawer hardware Home Depot had...It opens so smoothly and you can pull it all the way to the back of the drawer. Drawer Hardware was about $30 for two. We got the bird drawer-pulls at Hobby Lobby for about $4 each, so $8 total.
Mom and Dad gave Chris a Kreig Jig for his birthday. It was absolutely invaluable in this project...all of the wood was about 3 inches wide, so we had to attach a TON of little pieces to make any kind of surface. You can't see in these photos, but the sides and back of each one are paneled, as well as the top. It took us a lot of time to put these together--used up all of our weekends and free days for about a month and a half. We LOVE them, but we've agreed we would NEVER build these ever ever ever again....it was too much work reusing old pallets and jigging all those tiny pieces. However, it was a good deal...We paid $72 for both of them! (And that would have been closer to $50 if we had done a little work and got free pallets...still, I think the wood was a little better quality and in better shape buying it. Most pallets are hardwood, and the different kinds of woods add some nice character and color to each piece. We decided not to stain them, because we loved the natural color of the wood.
We did have a lot of wood leftover, and we didn't mind doing a few simple follow-up projects with some nicer pieces of wood.
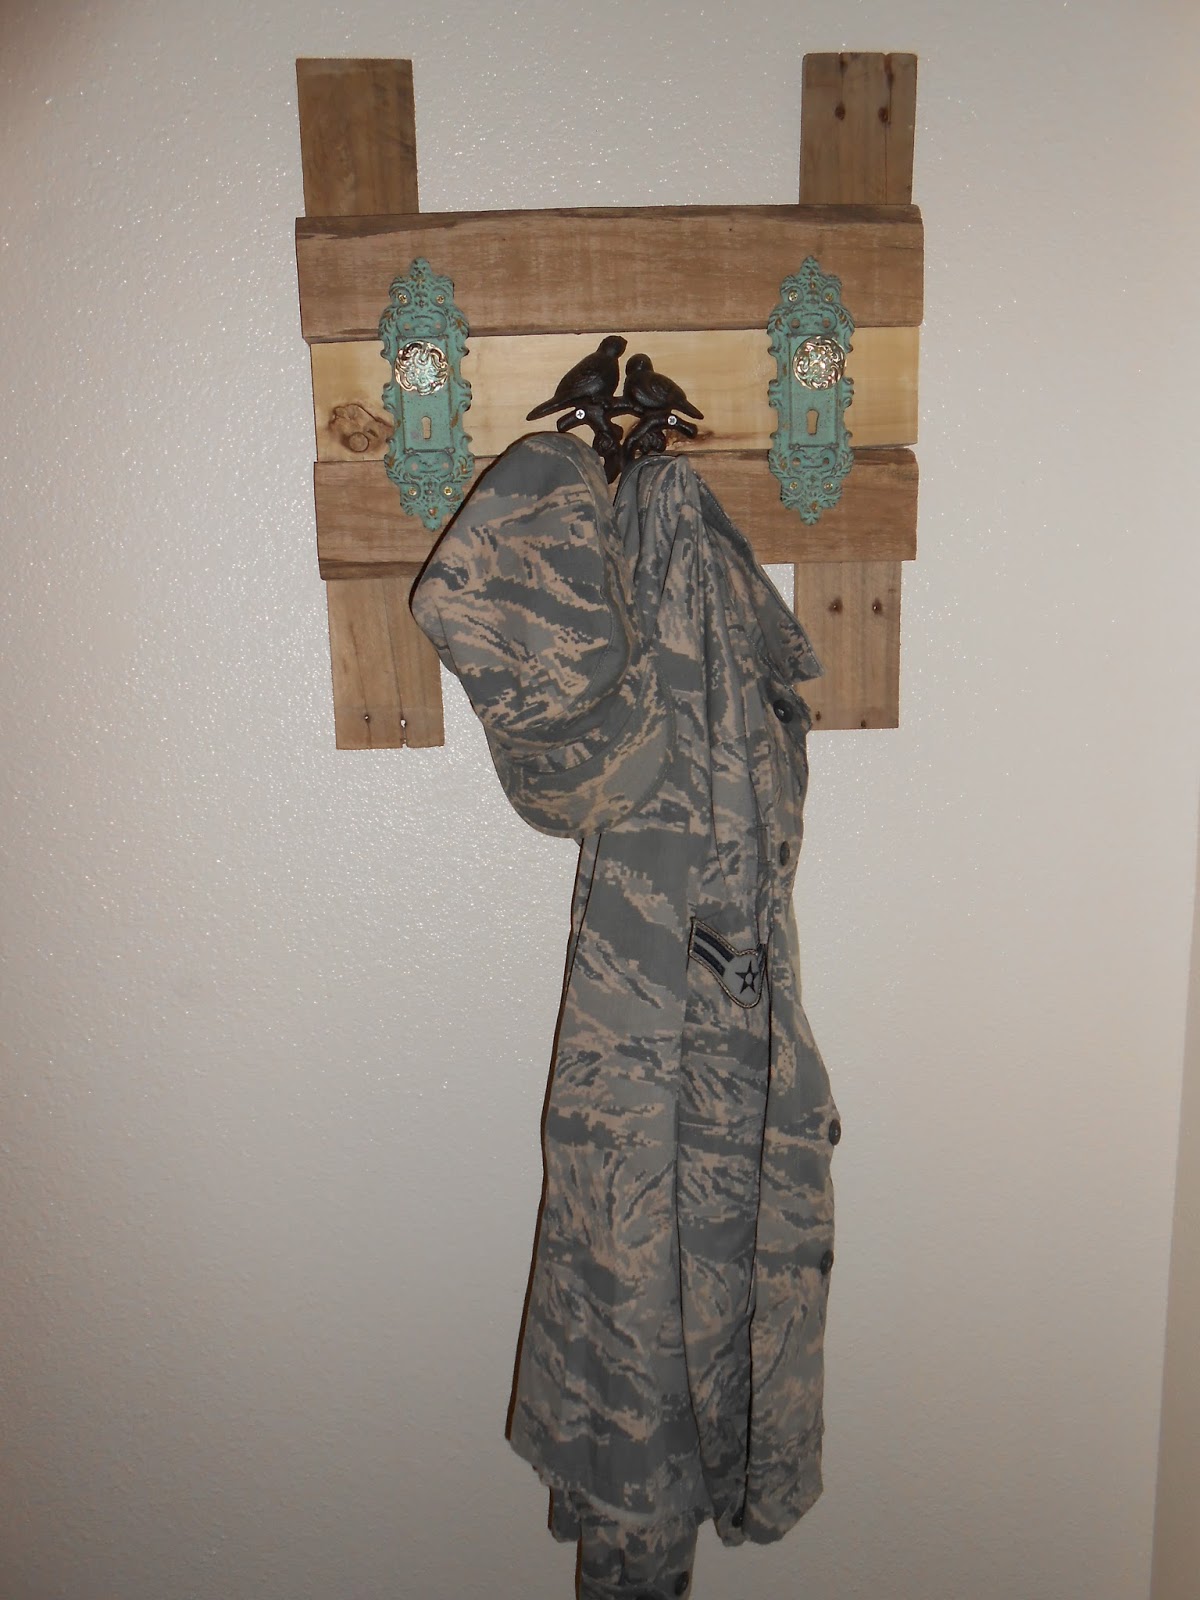
I actually made this coat hanger by myself!! Chris wasn't even in the shop. It was pretty simple, and we found some pretty hardware that matched the blue birds on our nightstands. Total cost: $15 for hardware from Hobby Lobby.
It may look a little feminine, but that hasn't stopped Chris from taking it over. He much prefers hooks to hangers or towel racks. ;)
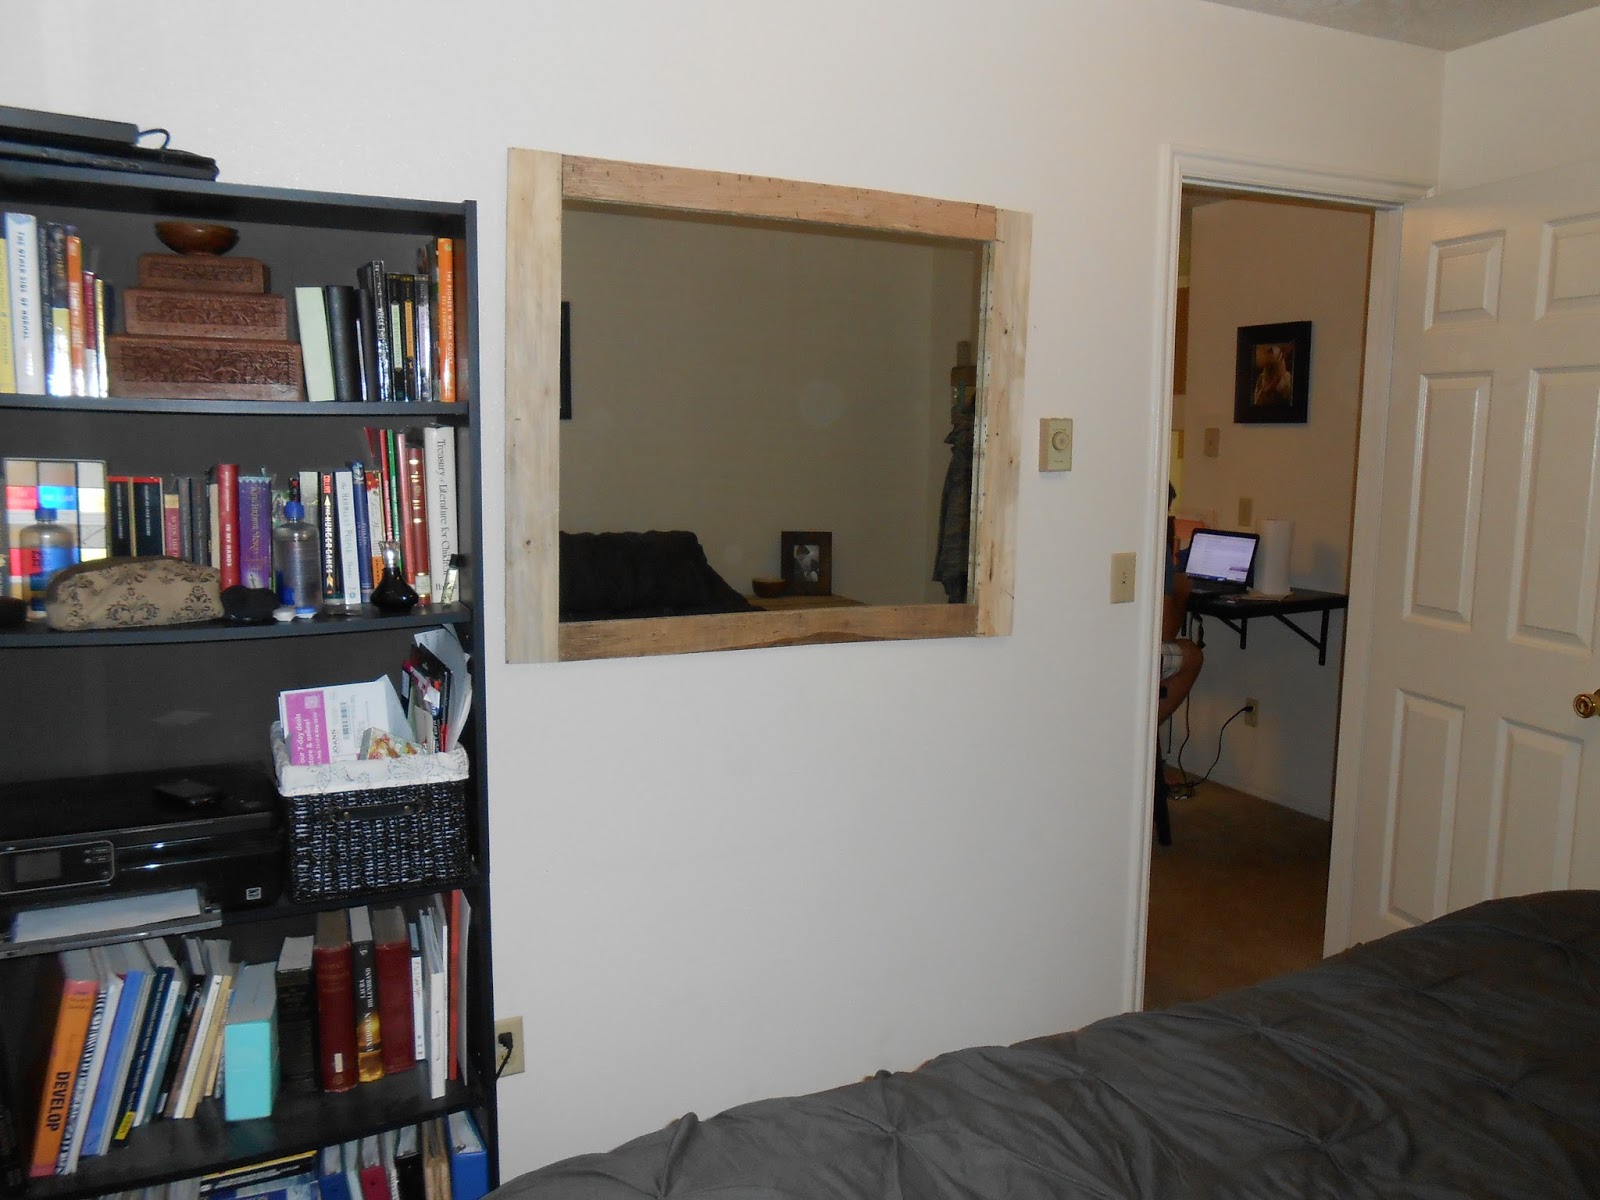
I couldn't get a good picture of the mirror we made together...so this is the best I've got. It's also made of pallet wood, kreig jigged together and glued with mirror adhesive. Total cost: about $40. Mirrors are MUCH cheaper when you buy the pane from Home Depot and frame it yourself. It's actually pretty huge, this picture makes it look smaller than it really is.
We had some really interesting pieces that we turned into shelves. Again, it's hard to tell, but the edges are curved and uneven, and make it look like the wood just washed up on the beach. We used the Kreig Jig on these, too, so they look like floating shelves.
We thought about making a little headboard for our bed, but decided that we didn't want our house absolutely dominated by pallets. I'm planning on building a tufted white linen headboard, after we finish all the other projects on our list. (I'm redoing my spice cupboard, and we are sanding down our trunk and restaining it next week...and Chris has been doodling sketches for Ruth and Jordan's window bench for a while now. Today he told me he just "stopped by Home Depot really quick" to just "look around at some prefab that matches their wainscoting." I have a feeling that we will be building their bench in the next week or two, as well.)
The drawer is SUPER NICE. We splurged here and got the nicest drawer hardware Home Depot had...It opens so smoothly and you can pull it all the way to the back of the drawer. Drawer Hardware was about $30 for two. We got the bird drawer-pulls at Hobby Lobby for about $4 each, so $8 total.
Mom and Dad gave Chris a Kreig Jig for his birthday. It was absolutely invaluable in this project...all of the wood was about 3 inches wide, so we had to attach a TON of little pieces to make any kind of surface. You can't see in these photos, but the sides and back of each one are paneled, as well as the top. It took us a lot of time to put these together--used up all of our weekends and free days for about a month and a half. We LOVE them, but we've agreed we would NEVER build these ever ever ever again....it was too much work reusing old pallets and jigging all those tiny pieces. However, it was a good deal...We paid $72 for both of them! (And that would have been closer to $50 if we had done a little work and got free pallets...still, I think the wood was a little better quality and in better shape buying it. Most pallets are hardwood, and the different kinds of woods add some nice character and color to each piece. We decided not to stain them, because we loved the natural color of the wood.
We did have a lot of wood leftover, and we didn't mind doing a few simple follow-up projects with some nicer pieces of wood.
It may look a little feminine, but that hasn't stopped Chris from taking it over. He much prefers hooks to hangers or towel racks. ;)
I couldn't get a good picture of the mirror we made together...so this is the best I've got. It's also made of pallet wood, kreig jigged together and glued with mirror adhesive. Total cost: about $40. Mirrors are MUCH cheaper when you buy the pane from Home Depot and frame it yourself. It's actually pretty huge, this picture makes it look smaller than it really is.
We had some really interesting pieces that we turned into shelves. Again, it's hard to tell, but the edges are curved and uneven, and make it look like the wood just washed up on the beach. We used the Kreig Jig on these, too, so they look like floating shelves.
We thought about making a little headboard for our bed, but decided that we didn't want our house absolutely dominated by pallets. I'm planning on building a tufted white linen headboard, after we finish all the other projects on our list. (I'm redoing my spice cupboard, and we are sanding down our trunk and restaining it next week...and Chris has been doodling sketches for Ruth and Jordan's window bench for a while now. Today he told me he just "stopped by Home Depot really quick" to just "look around at some prefab that matches their wainscoting." I have a feeling that we will be building their bench in the next week or two, as well.)
Sunday, May 26, 2013
Canned Beginnings
Yesterday was a very busy day! Allison, Chris' sister, is staying with us, and she has been such a good sport--we dragged her all around the valley yesterday, and she was so helpful and patient with us. She came to help Ruth and Jordan move into their new house (which was pretty fun to start organizing and setting up. Evelyn was super cute scooting around on the slippery wood floors and sucking on everyone's frozen water bottles.) We ran some errands and came home for a nap, and Chris got a really bad migraine. About this time I was feeling really bad that we didn't have a fun plan for her first day here, so I decided it would be fun to do something crafty, and strawberry freezer jam was the winner.
I'm not sure if Allison really wanted to make jam, but I thought it was fun, and she was really really helpful--she washed all the jars and kept track of the timing....actually, she did most of the work. I really hope she liked it. I had a lot of fun getting to spend time with her and getting to know her better.
It was really nice to be able to finally use some of the mason jars from my reception...They have been filling up more than their fair share of space in my cupboards. Now that I've tested the waters with freezer jam, I'm starting to get ideas about applesauce and peaches...I need a teacher, and a pressure canner.
Note: I'm really, really, really glad we followed the instructions (the recipe from the Pectin box) EXACTLY. When we did our first batch, we were really surprised at the amount of sugar it said to put in, and when we tasted the sugar and strawberry mixture, it was overwhelmingly too sweet.
...But after we added the boiled pectin and water mixture, it was absolutely perfect. (Thanks, Allison, for reassuring me and convincing me to not half the sugar in the next recipe!!)
About the time we were cleaning up, Chris resurfaced and we decided to have a cookout (Bratwurst is always good, but it is absolutely amazing on the grill!!) Daniel and Heather came over, too...it ended up being a really fun night.
Any recommendations for things to can? I know peaches and applesauce is always good, but my imagination seems to halt there. ...Also, does anyone want to can with me next month (Assuming here that only my family reads my blog...sorry all you random internet surfers. ;))
I'm not sure if Allison really wanted to make jam, but I thought it was fun, and she was really really helpful--she washed all the jars and kept track of the timing....actually, she did most of the work. I really hope she liked it. I had a lot of fun getting to spend time with her and getting to know her better.
It was really nice to be able to finally use some of the mason jars from my reception...They have been filling up more than their fair share of space in my cupboards. Now that I've tested the waters with freezer jam, I'm starting to get ideas about applesauce and peaches...I need a teacher, and a pressure canner.
Note: I'm really, really, really glad we followed the instructions (the recipe from the Pectin box) EXACTLY. When we did our first batch, we were really surprised at the amount of sugar it said to put in, and when we tasted the sugar and strawberry mixture, it was overwhelmingly too sweet.
...But after we added the boiled pectin and water mixture, it was absolutely perfect. (Thanks, Allison, for reassuring me and convincing me to not half the sugar in the next recipe!!)
About the time we were cleaning up, Chris resurfaced and we decided to have a cookout (Bratwurst is always good, but it is absolutely amazing on the grill!!) Daniel and Heather came over, too...it ended up being a really fun night.
Any recommendations for things to can? I know peaches and applesauce is always good, but my imagination seems to halt there. ...Also, does anyone want to can with me next month (Assuming here that only my family reads my blog...sorry all you random internet surfers. ;))
Friday, May 24, 2013
My First-Ever Garden!!
I have very fond memories of gardens from my childhood...the one in Zanesville, Ohio that seemed like an entire field of beans, the modestly sized one in Portage, Michigan that was carefully tended by the deer and rabbits, and the one I helped my parents plant at a neighbor-sponsored community garden...I was so excited to make beet chips with that production, and I never did.
When Chris and I moved into an apartment with garden plots, I immediately wanted one. And a month or so ago, my sweet husband went to the office and picked one out...the huge one on the corner. :) ...and for the past month, it has been enthusiastically befriended by every weed--and
tree!--that grows in Utah.
So, yesterday, after a few hours of planting a plethora of flowers in Ruth's new garden, the mud between my toes whispered to me and I felt a surge of excitement to plant my little vegetable garden. Ruth, Elise and I went to this ADORABLE little nursery in Orem--seriously, I want to live there--and picked out the plants I had planned and several we impulsively fell in love with. ...And after a whole morning of gardening, Elise still had the kindness and energy to stay with me and plant. (Ruth had to take Evelyn home for a nap, but she lent me her gardening tools.)
I had assumed that, since it was just a small plot, we wouldn't spend much time...pull out a few weeds, maybe turn over the soil, and viola! a perfect garden.
The weeds had other ideas.
Elise and I spent about 3 hours just preparing the soil of this tiny 4x5 plot. The weeds did not want to be weeded, and the trees were very thick and very deeply rooted in the dusty rock that some fool called soil. And someone before us put a ton of mulch in the garden, along with a lot of BIG rocks...so we filled 4 or 5 bags with all of that junk before we even got to all the roots. After a LOT of work, and about a dozen watering-cans of water (Seriously, that soil was a dry, solid ROCK), we finally started turning over the soil and mixing in some planting soil. About this time, Elise's hand ripped open (she had an enormous blister) and we went inside to clean it and bandage it up. I was feeling pretty awful about having her help around now, and getting ready to call it quits, but she went right back outside and we kept working. (Thankyouthankyouthankyou, my sweet hardworking sister!!)
Eventually, we got around to planting, and it was so fun and SO satisfying. This is what we fit in our little garden:
6 red lettuce
6 lettuce
1 zucchini
6 green bell pepper
2 strawberry
1 row bush beans
1 row tricolor beans
1 row sugar snap peas
1 row green onion
It is such a beautiful little garden, and I was so excited about it that I couldn't bear to be done with it...so I gathered up some of the rocks I'd removed previously and painted them to be markers. Then I started worrying about the paint washing off in water, so I found some shoe water proofer and sprayed them all...It worked fabulously, the water beads up on the rocks!! So so cool.
I can't wait to show my family when they come out for all the weddings!!
When Chris and I moved into an apartment with garden plots, I immediately wanted one. And a month or so ago, my sweet husband went to the office and picked one out...the huge one on the corner. :) ...and for the past month, it has been enthusiastically befriended by every weed--and
tree!--that grows in Utah.
So, yesterday, after a few hours of planting a plethora of flowers in Ruth's new garden, the mud between my toes whispered to me and I felt a surge of excitement to plant my little vegetable garden. Ruth, Elise and I went to this ADORABLE little nursery in Orem--seriously, I want to live there--and picked out the plants I had planned and several we impulsively fell in love with. ...And after a whole morning of gardening, Elise still had the kindness and energy to stay with me and plant. (Ruth had to take Evelyn home for a nap, but she lent me her gardening tools.)
I had assumed that, since it was just a small plot, we wouldn't spend much time...pull out a few weeds, maybe turn over the soil, and viola! a perfect garden.
The weeds had other ideas.
Elise and I spent about 3 hours just preparing the soil of this tiny 4x5 plot. The weeds did not want to be weeded, and the trees were very thick and very deeply rooted in the dusty rock that some fool called soil. And someone before us put a ton of mulch in the garden, along with a lot of BIG rocks...so we filled 4 or 5 bags with all of that junk before we even got to all the roots. After a LOT of work, and about a dozen watering-cans of water (Seriously, that soil was a dry, solid ROCK), we finally started turning over the soil and mixing in some planting soil. About this time, Elise's hand ripped open (she had an enormous blister) and we went inside to clean it and bandage it up. I was feeling pretty awful about having her help around now, and getting ready to call it quits, but she went right back outside and we kept working. (Thankyouthankyouthankyou, my sweet hardworking sister!!)
Eventually, we got around to planting, and it was so fun and SO satisfying. This is what we fit in our little garden:
6 red lettuce
6 lettuce
1 zucchini
6 green bell pepper
2 strawberry
1 row bush beans
1 row tricolor beans
1 row sugar snap peas
1 row green onion
It is such a beautiful little garden, and I was so excited about it that I couldn't bear to be done with it...so I gathered up some of the rocks I'd removed previously and painted them to be markers. Then I started worrying about the paint washing off in water, so I found some shoe water proofer and sprayed them all...It worked fabulously, the water beads up on the rocks!! So so cool.
I can't wait to show my family when they come out for all the weddings!!
Subscribe to:
Posts (Atom)